How to Install and Configure Exchange Server 2013 on Windows Server 2012 R2
Installation and Configuration of Exchange Server 2013 on Windows Server 2012R2/2016/2019/2022
Exchange Server is a mail, scheduling and calendaring server
that is develop by Microsoft. Exchange Server is based on three layers Network
Layer, messaging layer and directory layer.
Users/Employees/Senior Management can communicate with each
other easily through mail that is official communication. Exchange Server is
work with Active Directory Domain Services, so the users that are available in
Active Directory Domain Services email each other locally. Users of on premises
organization can send and receive emails outside of the organization by use of
Public IP address that need to allow email send and receive feature by IP
vendor. In Exchange Server Database Availability Group (DAG) is use for High
Availability (HA) of user’s mailbox. In Single Database Availability Group (DAG),
total 16 exchange servers replicate mailbox data to each other. In Database
Availability Group (DAG), one node work as a witness server that contains all
the information about DAG.
Microsoft provide exchange on premises and exchange online,
both have pros and cons. The main difference between the exchange on premises
and exchange online is hardware, in exchange on premises hardware maintenance
and it’s repairing responsibility of System Administrator and for exchange
online the hardware maintenance and it repairing is not the responsibility of
System Administrator but it is expensive in term of cost. In terms of security
Exchange Online have drawback; its data security control is not totally in the
hand of System Administrator.
Exchange Server has five roles that are list below.
- · Mailbox Server.
- · Client Access Server.
- · Hub Transport Server.
- · Edge Transport Server.
- · Unified Messaging Server.
Mailbox Server:
The mailbox server role is use to manage mailboxes, public
folder database, resource scheduling and address list. Mailbox Server also
manage Database Availability Group (DAG). Mailbox database contain emails,
contacts, calendar, fax data and voice mail.
Client Access Server:
Client Access Server role is use to manage client protocols that
allow user to access their mailboxes, the protocols use by remote users that
are POP3, IMAP4, HTTPS and Outlook Anywhere and exchange server active sync.
While MAPI is directly connected with Client Access Server for check mails.
Client access role provide three services availability service, auto discover
service and web service (Outlook web access).
Hub Transport Server:
Hub Transport Server role is use to manage mail flow in an
organization means it is used to route a mail in an organization that is called
mail flow. Through Hub Transport Server role mail send in an organization then
it forward to the mailbox.
Edge Transport Server:
The Edge Transport Server role is used to manage mail route
outside of the organization. The Edge Transport Server receive mail messages
from outside of an organization through internet then route the mail to Hub
Transport Server after protect the mail as spam messages and from viruses. The
Edge Transport Server is install on DMZ network for send and receive mail
through internet securely that is the reason Edge Transport Server is not
member server of Active Directory Domain Services.
Unified Messaging Server:
Unified Messaging Server role is use to manage users voice
mails, email, fax messages and calendar data that is a part of inbox.
Installation of Exchange Server 2013:
To install the Exchange Server 2013, first install its prerequisites.
The prerequisites are mention below.
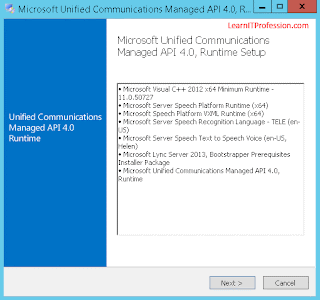
- · Unified Communication Managed API 4.0 Runtime (UcmaRuntimeSetup).
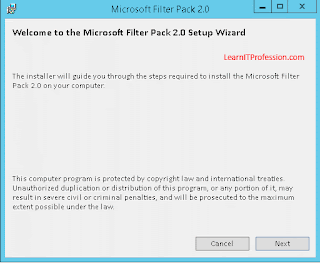
- · Microsoft Filter Pack 2.0 (FilterPack64bit).
- · Microsoft office 2010 Filter Pack Service Pack 1 (filterpack2010sp1-kb2460041-x64-fullfile-en-us).
First, install Unified Communication Managed API 4.0 Runtime
(UcmaRuntimeSetup).
Second prerequisite of Exchange Server 2013 is Microsoft
Filter Pack 2.0, therefore install it.
Third and last prerequisite of Exchange Server 2013 is
Microsoft office 2010 Filter Pack Service Pack 1 (filterpack2010sp1-kb2460041-x64-fullfile-en-us),
install it.
Now install Exchange Server 2013 on Windows Server 2012 R2,
you can install Exchange Server 2013 on Windows Server 2016/2019/2022.
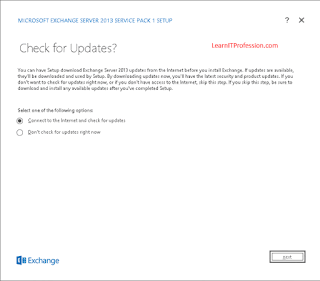
Select “connect to the internet and check for the updates”
then click next to continue.
Click “Next” on Downloading updates.
Setup is copying the files that is require for the installation
of Exchange Server 2013.
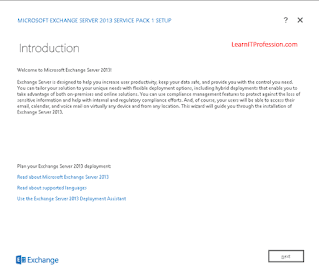
In introduction window, it gives a little information about
the Exchange Server. Click next to continue.
For accept the license agreement, select “I accept the terms
in the license agreement” then click next to continue.
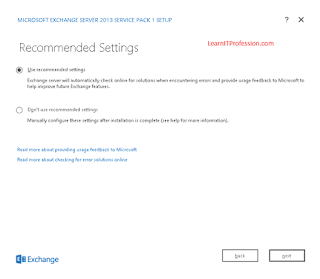
Select “Use recommended settings”, due to this selection Exchange server will automatically check online error solutions. Click “Next” to continue.
In Server Role Selection, select Exchange Server Roles that are Mailbox role and Client Access Role. In Client Access Role, the Unified Messaging and Hub Transport Server Role are included.
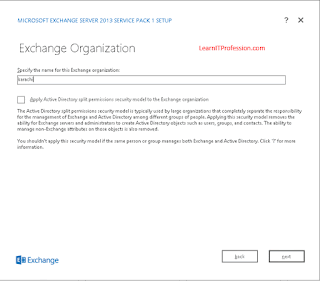
Provide the name of Exchange Organization. Here we have
provide the Exchange organization name is “Karachi”, you can provide as per
your choice. Click “Next to Continue”.
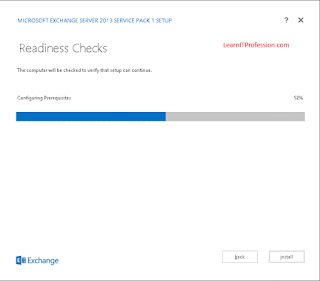
It is configuring prerequisites, after complete prerequisites
configuration click “Next” to continue.
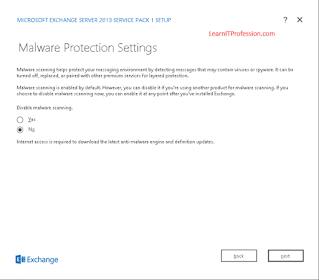
In Malware Protection Settings Select “No” under options on
Disable malware scanning. Click “Next” to continue.
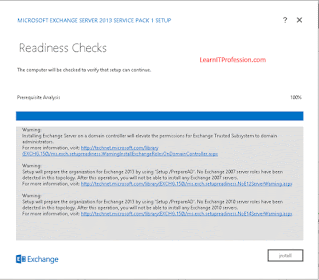
It gives some warning, before install the Exchange Server 2013 first resolve the warnings then click “install”.
Setup is in progress. The installation of Exchange Server 2013 complete in 15 steps.
The installation of Exchange Server 2013 has been completed successfully. For license click on “server” and provide keys. We have licensed of Exchange Server 2013 for standard edition.
After provide the license key Restart Service “Microsoft
Exchange Information Store”, to restart the service “Microsoft Exchange Information
Store” go to the services then find this service and restart it.
Create Send Connector:
By default receive connector is created to receive the mail
inside the organization. Send connector need to be create for send the mail
from one email id to another email id within the organization.
To create a send connector, open Exchange Admin Center (ecp)
on web browser. Go to the mail flow then click on send connectors.
Provide a name of Send Connector “Send-Connector” and select type “Internet (For example, to send internet mail)”; you can select “Internal (For example, to send intranet mail)” for send mails inside the organization only.
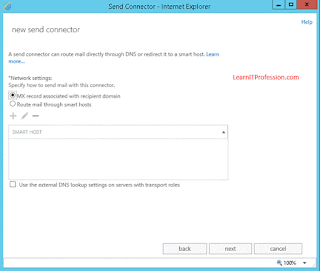
On Network settings, select “MX record associated with recipient domain”. Click “Next” to continue.
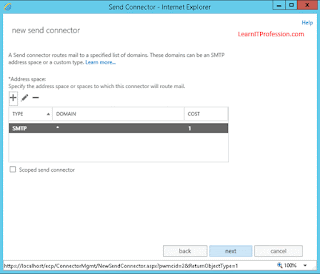
Provide below mention details on Address space – Webpage
Dialog for Send Mail Transfer Protocol “SMTP”.
Type: SMTP
Full-Qualified Domain Name (FQDN): *
Cost: 1
After provide the details click on “save”.
The new address space has created that use for route the mails with in organization.
For source server select the server, in this lab scenario we
have only single server therefore select it, this server has mailbox and client
access role. Click finish to complete the configuration of Send Connector.
The Send Connector has successfully created, you can see in
the below image.
In this lab environment, accepted domain name is
“Pakistan.local1”. You need to create accepted domain if you want to send mail
outside the local domain or you can say outside the organization, the accepted
domain for outside email you need to buy then you will configure on accepted
domain in exchange server and have to configure purchased domain for outside
email on DNS Server. Here we only configure send and receive mail in
organization therefore leave default configuration of accepted domain.
- Create MX and host record on DNS Server for Exchange Server.
If you want to move default database mailbox, the command is mention below.
Move-DatabasePath -Identity “Mailbox Database Name”
-EdbFilePath “E:\Exchange\Mailbox Database Name.edb ”
Practical Example:
Move-DatabasePath -Identity “Mailbox Database 0330231991”
-EdbFilePath “E:\Exchange\Mailbox Database 0330231991.edb ”
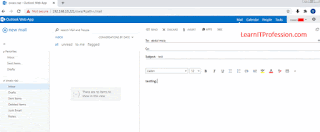
Owais send email to abdul moiz
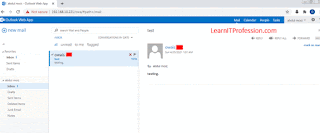
Email receive on Abdul Moiz Inbox.
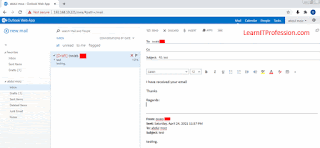
Abdul Moiz reply email to Owais
Email receive on Owais mailbox.













Comments
Post a Comment