Backup and Restore Gitlab Omnibus on CentOS 7
Backup and Restore Gitlab Omnibus Community Edition on CentOS 7
Create a Backup of Gitlab Omnibus on CentOS 7:
Backup of every server is very necessary in production environment. Most of the Enterprise Sectors, Organizations and Software Houses take backup of Gitlab everyday through manually or set scripts in cron jobs.
To take a backup of Gitlab manually type the below command.
gitlab-rake gitlab:backup:create
Gitlab backup is in processing mode, you can see that it is automatically make Gitlab Backup file with tar extension.
Gitlab backup is create in its default backup directory that is mention below.
/var/opt/gitlab/backups/
you can create a cron job for Gitlab backup. To take a Gitlab backup automatically through cron job on specific time, type the below command.
To stop the below Gitlab processes that are connected to the database and leave the rest of Gitlab processes running.
crontab -e
Edit the below line. It means Gitlab backup will automatically create at 1:00 am everyday.
0 1 * * * /opt/gitlab/bin/gitlab-rake gitlab:backup:create CRON=1
To Check the cron job on Gitlab server type the below command.
crontab -l
Restore a Gitlab Omnibus Backup on CentOS 7:
Restore of Gitlab Backup is only apply on the same version and type (Community Edition/Enterprise Edition). For example Gitlab Community Edition 9.1.4.
Before restore a Gitlab backup, reconfigure a Gitlab and check the Gitlab processes is running or not.
To reconfigure a Gitlab type the below command, this command must run at least one time before restore a Gitlab backup.
gitlab-ctl reconfigure
Gitlab has successfully reconfigured. This result appear when you install a fresh Gitlab Server.
To check all Gitlab processes is running type the below command.
sudo gitlab-ctl status
If any Gitlab processes is not running type the below command to start all the Gitlab processes.
sudo gitlab-ctl start
To copy the backup tar file in Gitlab default backup directory type the below command.
cp 1597003530_2020_08_10_gitlab_backup.tar /var/opt/gitlab/backups/
To check the default backup directory path of Gitlab edit the Gitlab configuration file "gitlab.rb" that available in directory "/etc/gitlab/gitlab.rb" by use of vi editor.
vi /etc/gitlab/gitlab.rb
Uncomment the below mention line.
gitlab_rails['backup_path'] = "/var/opt/gitlab/backups"
Change the owner of Gitlab default backup directory path to user "git".
sudo chown git.git /var/opt/gitlab/backups/1597003530_2020_08_10_gitlab_backup.tar
sudo gitlab-ctl stop unicornsudo gitlab-ctl stop pumasudo gitlab-ctl stop sidekiq
To check the Gitlab processes has stopped that are connected to database type the below command.
sudo gitlab-ctl status
To restore the Gitlab backup type the below command. This command will overwrite the contents of your Gitlab database.
sudo gitlab-backup restore BACKUP= 1597003530_2020_08_10-ceorgitlab-rake gitlab:backup:restore BACKUP=1597003530_2020_08_10
Note: GitLab 12.1 and its earlier, use gitlab-rake gitlab:backup:restore.
Warning: Gitlab official site says "gitlab-rake gitlab:backup:restore is not set the right file system permissions on Registry directory of Gitlab server. On GitLab 12.2 and its new version, you can use gitlab-backup restore to avoid this issue."
In our case we are restoring Gitlab Omnibus Community Edition 9.1.4, to restore this edition type the below command.
gitlab-rake gitlab:backup:restore BACKUP=1597003530_2020_08_10
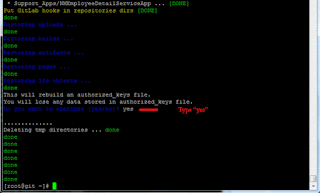
The Gitlab Backup has successfully restored.
if necessary restore /etc/gitlab/gitlab-secrets.json
After successfully restore Gitlab backup, Reconfigure, restart and check the Gitlab.
To reconfigure the Gitlab type the below command.
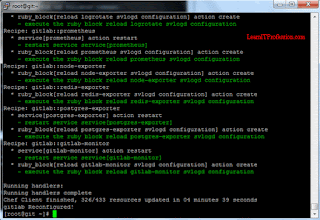
sudo gitlab-ctl reconfigure
The Gitlab has successfully reconfigured.
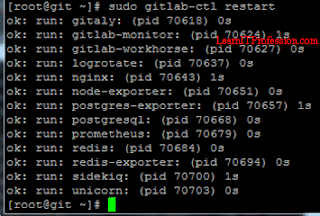
sudo gitlab-ctl restart
To check the Gitlab Shell type the below command.
sudo gitlab-rake gitlab:check SANITIZE=true
Gitlab Shell has successfully checked.
Open the restore Gitlab Server on browser with root user by use of below URL.
http://git.domain.com
or
http://git
User "root" has successfully login.
To integrate Gitlab server with Active Directory >>Read.
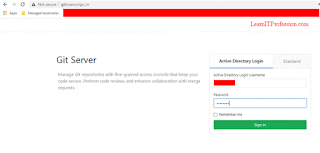
Login with Active Directory User.
You can see that all project insight Gitlab server has successfully restored.
Thanks for Read this Article


Comments
Post a Comment