Installation of Oracle Linux 6 with LVM
Installation of Oracle Linux 6.5 with LVM
Oracle Linux is use a same command as Red Hat Enterprise Linux.Oracle Linux is use for E-Business Suit that is Enterprise Resource Planning. Here we describe how to install Oracle Linux 6.5 with LVM that can be use for E-Business suit Application and Database machines.
LVM stands for Logical Volume Manager. By use of LVM the logical partition can easily resize as per the requirement. In Logical Volume Manager (LVM) a Volume Group is create and multiple logical partitions can be create inside Volume Group. Logical Volume Manager (LVM) can be create by use of single or multiple hard drives.
Here Oracle Linux 6.5 is installing on Virtual Machine of ESXI 6.7 Server by use of ISO image file.
To install Oracle Linux 6.5 boot the machine with an ISO file and click on Install or upgrade an existing system to process the installation.
To test the media means an ISO image click on OK, you can skip the media test process.
Click on test button to test the ISO image file of Oracle Linux 6.5.
The Oracle Linux 6.5 ISO image file test process is in progress.
The Oracle Linux 6.5 ISO image file has successfully tested, click on OK.
After complete the test process of ISO image file, The ISO image file will eject press OK to continue.
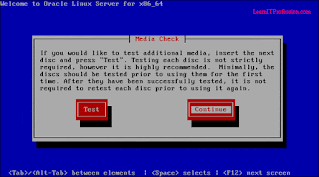
It gives option to test another media or click continue to process the installation of Oracle Linux 6.5. We will select continue to process the installation of Oracle Linux 6.5.
Click on next to start the installation process of Oracle Linux 6.5 with LVM.
Select English Language for the installation process, you can select your own language.
Select U.S. English keyboard layout, you can select any other keyboard layout as per your need.
Select storage device option "Basic Storage Devices" for the installation of Oracle Linux 6.5 with LVM then press Next.
After select the storage device option, it will give the option to "Yes, discard any data" or "No, keep any data" on Vmware Virtual disk. Select "Yes, discard any data" for fresh installation of Oracle Linux 6.5 with LVM then press next.
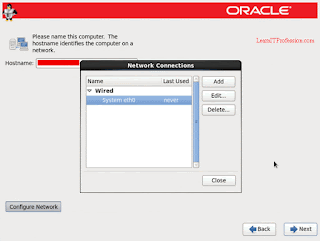
Enter the hostname of Oracle Linux 6.5. If you have a domain environment enter the Full Qualified Domain Name (FQDN).
To Configure the IP address of Oracle Linux 6.5 click on Configure Network. Select System eth0 then click Edit.
Click on IPv4 Settings. Select Method as Manual. Set the IP address and DNS server addresses, If you have a domain environment enter the domain name in Search domains. Select check marks Connect automatically and Available to all users then click Apply.
Note: When you enter the domain name in Search domains its not means Oracle Linux 6.5 has joined the domain, its mean Oracle Linux 6.5 just locate through Host name in domain environment.
After Configure the IP address click close the Network Connections then click Next.
Select city as per your server location, Here city Asia/Karachi has selected. And apply check mark System clock uses UTC, UTC stands for Universal Time Coordinated.
Enter the root password of Oracle Linux 6.5. Root is the main account for administering the system.
To create manual partitions of Oracle Linux 6.5 select Create Custom Layout then click Next.
The Partition that we are creating in Oracle Linux 6.5 for Application and Database Machines are as Follows.
- / (Root Partition).
- /boot (Boot Partition).
- /app (Application Partition).
- /backup (Backup Partition).
- swap (SWAP Partition).
- /tmp (Temporary File Partition).
Boot Partition:
First we create boot partition as standard partition. Linux OS will not boot if boot partition create inside a Volume Group (VG) of Logical Volume Manager "LVM".
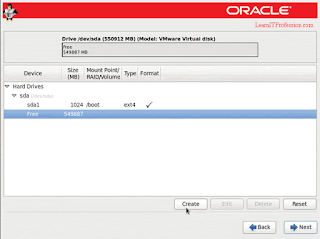
To create a boot partition select a hard drive then click create.
For Boot Partition select Standard Partition then click Create.
Requirement of Boot Partition are as follows.
;
Mount Point: /boot
File System Type: ext4
Size: 1GB.
Additional Size Options: Fixed Size.
Set the Mount Point of Boot partition "/boot", File System Type "ext4", Size "1GB" and Additional Size Options "Fixed size". After set all the requirements of boot partition click OK.
The /boot partition has successfully created. For other partitions / "root", /app, /backup, /tmp and swap we will create a Volume Group "VG" inside a Logical Volume Manager "LVM". To create a Volume Group "VG" inside a Logical Volume Manager "LVM" select free space of Hard Drive then click Create.
To create a Logical Volume Manager (LVM) select LVM Physical Volume then click Create.
Requirement of Logical Volume Manager (LVM) are as Follows.
File System Type: physical volume (LVM)
Additional Size Options: Fill to maximum allowable size
After set all the requirements of Logical Volume Manager "LVM" click OK.
To create a Volume Group "VG" inside a Logical Volume Manager "LVM", Select Logical Volume Manager partition "sda2" then click Create.
To create a Volume Group "VG" select LVM Volume Group then click Create.
Set the Volume Group Name and select a Physical Volume to Use "sda2" for create a Logical Volumes inside a Volume Group "VG".
The Logical Volumes that we will create inside a Volume Group "VG" for Application and Database machines of Oracle Linux 6.5 are / "root", /app, /backup, /tmp and swap.
Root Partition:
Root is the main "Top" partition of Linux Operating System, For successfully boot the Linux base operating system file system must be mount on Root "/" partition.
The requirement of root "/" logical volume are as follows.
Mount Point: /
File System Type: ext4
Logical Volume Name: root
Size: 40GB (Change size of root logical volume as per your environment need)
After set all the requirements of root "/" logical volume click OK to create it.
Application Partition:
Application partition is use for Oracle Linux 6.5 Application. The requirements of Application logical volume are as follows.
Mount Point: /app
File System Type: ext4
Logical Volume Name: app
Size: 263GB (Change size of application logical volume as per your environment need)
After set all the requirements of Application logical volume click OK to create it.
Backup Partition:
Backup partition is optional partition for Oracle Linux 6.5. This partition is use when you restore Oracle Linux 6.5 application and database, Means you need a space on machine to store a Backup of Oracle Linux 6.5 application and database then restore the application and database from backup.
The requirement of Backup Logical volume are as follows.
Mount Point: /backup
File System Type: ext4
Logical Volume Name: backup
Size: 207GB (Change size of backup logical volume as per your environment need)
After set all the requirements of backup logical volume click OK to create it.
Tmp Partition:
Tmp partition is use for the temporary files of Oracle Linux 6.5 application and database. Tmp partition is an optional partition. Temporary files is available on operating system until the operating system reboot.
The requirements of Tmp partition are as follows.
Mount Point: /tmp
File System Type: ext4
Logical Volume Name: tmp
Size: 10GB (Change size of tmp logical volume as per your environment need)
After set all the requirements of tmp logical volume click OK to create it.
SWAP Partition:
Swap partition is use when system RAM not full fill the need as per the requirement. SWAP Partition is an optional partition.
If System RAM is less then or equal to 2GB then SWAP Partition Should be Ram Size multiply by 2.
Example:
System RAM: 1GB
SWAP Partition: 1GB (Ram Size)* 2= 2GB (SWAP Partition)
If System RAM is greater then 2GB then 2GB should be add with RAM Size, this is for minimum size of SWAP Partition.
Example:
System RAM: 3GB
SWAP Partition: 3GB (RAM Size) + 2GB = 5GB (SWAP Partition)
The requirement of SWAP logical volume are as follows.
File System Type: swap
Logical Volume Name: swap
Size: 16GB (Change size of swap logical volume as per your environment need)
After set all the requirements of SWAP logical volume click OK to create it.
After create all the require logical volumes inside a Volume Group "VG" of Logical Volume Manager "LVM" click OK.
The all require Logical Volumes for Oracle Linux 6.5 has successfully created. In below image you can see that free space 13GB is available to create any new partition or extend the existing partition as per the requirement. Click Next to continue the installation process.
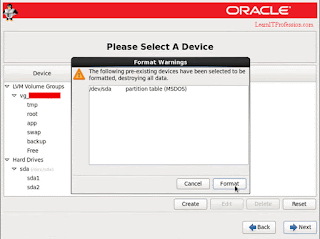
After click next it gives the warning format the partition or cancel it for any change. Click format to continue the installation process.
Then click on Write changes to disk.
Make sure install boot loader drive is select then click Next.
By default Basic Server for installation is select, For Graphical user interface "GUI" we will select Desktop for installation and also select Customize now for additional features.
you can select the additional features then click Next.
The installation process of Oracle Linux 6.5 is in progress.
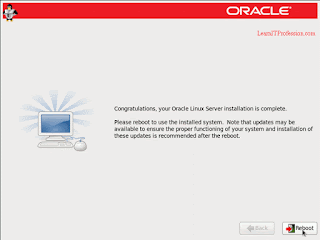
The Oracle Linux Server 6.5 has successfully installed, click reboot to Configure some settings of Oracle Linux Server 6.5.
After reboot welcome screen is appear, click Forward to continue for Oracle Linux 6.5 fundamental configurations.
For license agreement choose option Yes, I agree to the License Agreement then click Forward.
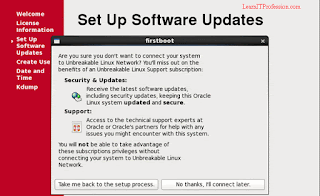
For Set Up Software Updates choose option No, I prefer to register at a later time then click Forward.
Click on No thanks, I'II connect later.
After Set Up Software Updates settings click forward.
Create a user for non-administrative use, Here we create a user with username "oracle" then click forward.
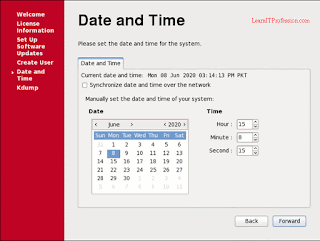
For Date and Time set date and time manually.
if you have a NTP (Network Time Protocol) Server click on check mark Synchronize date and time over the network. Here we have a NTP Server therefore we click on check mark Synchronize date and time over the network.
Remove existing NTP Servers and set local NTP Servers as per your environment, Here we have a single NTP Server.
After Set Up NTP Server click Forward to continue the installation process.
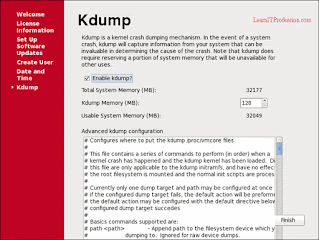
Click on check mark to enable Kdump, Kdump is a kernal crash dumping mechanism. When you enable Kdump it reserve a system memory that is not available for other uses. By default Oracle Linux 6.5 installation reserve Kdump memory 128MB, you can set as per your need.
After Enable Kdump click Finish then click OK to reboot the system for set up proper basic configurations.
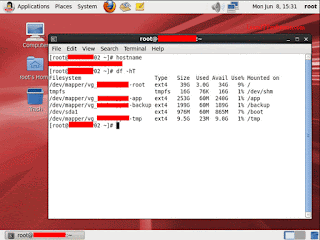
Login with root user in Oracle Linux 6.5 with LVM.
To check Host name and partitions of Oracle Linux 6.5 with LVM type the below commands.
hostnamedf -hT
To Install Oracle EBS Server R12 on Oracle Linux 6.5 click on >>Read.
Thanks for read this Article
Installation of Oracle EBS Server R12 on Oracle Linux 6.5
Configure Proxy Settings on Oracle Linux 6.5
Installation and Configuration of VNC Server on Oracle Linux 6.5
Add Additional Hard Disk on Oracle Linux 6.5/Red Hat/CentOS
Configure SNMP Service on Oracle Linux 6.5
Installation of Centos 7 with LVM
Installation of Debian 9 with LVM


















Comments
Post a Comment