Installation of Centos 7
Installation of Centos 7
Centos is a flavor of Linux that is open source. In Centos similar command is run as compare to Red Hat. Centos officially become a part of Red Hat since January 2014.
Prerequisites Installation of Centos 7
If you are installing Centos 7 in virtualization environment you need an ISO file of Centos 7 or if you are installing Centos 7 on physical machine you need a bootable DVD of Centos 7 or bootable USB. There are so many tools burn ISO image into DVD for example Power ISO and for bootable USB you can use rufus.
Installation of Centos 7 with default partition format
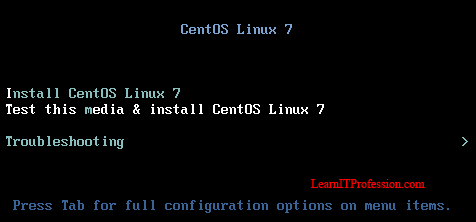
Boot System from Centos 7 installation media, Press enter on Install CentOS Linux 7 by using up and down arrow keys.
Installation process is start by press enter key, in the below image you can see ISO file of Centos 7 checking process in progress.
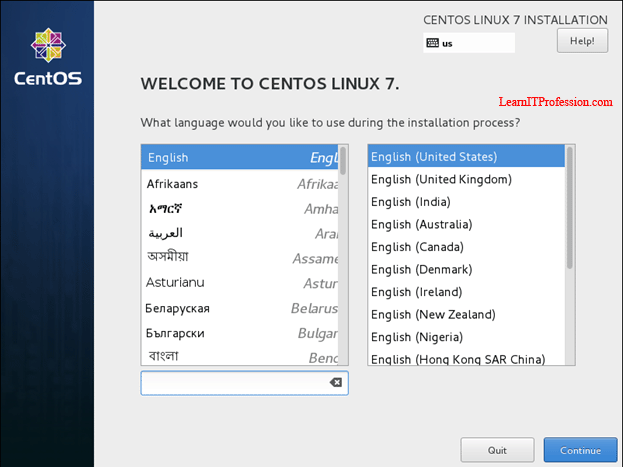
If you want to skip the checking process of Centos 7 ISO file just press Esc key or wait for complete the checking process of Centos 7 ISO file. After complete the checking process select the language of Centos Linux 7 installation.
By default English language is select and for default keyboard settings English (United States) is select, you can choose your own language for installation process other wise keep continue with default settings.
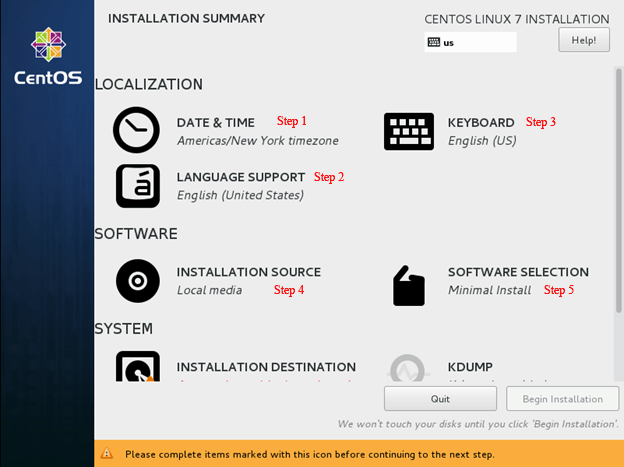
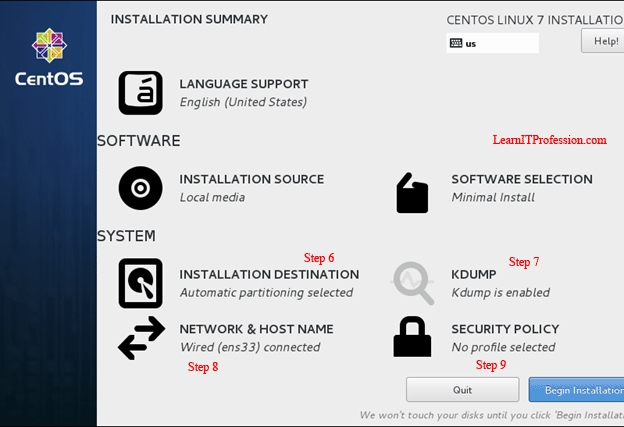
In installation Summary total nine (9) steps need to be configure for complete the installation process.
The steps are shown in the below images and describe you step by step.
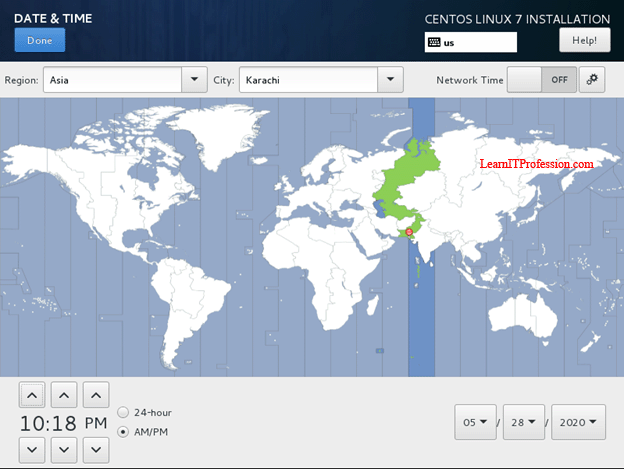
In Step 1 set the DATE & TIME as per your machine location Centos Linux 7. Here region Asia is select and city is Karachi. Click Network Time button to on it for communicate Centos Linux 7 machine with standard network time and also set the date and time. After set all the settings as per your need press Done button.
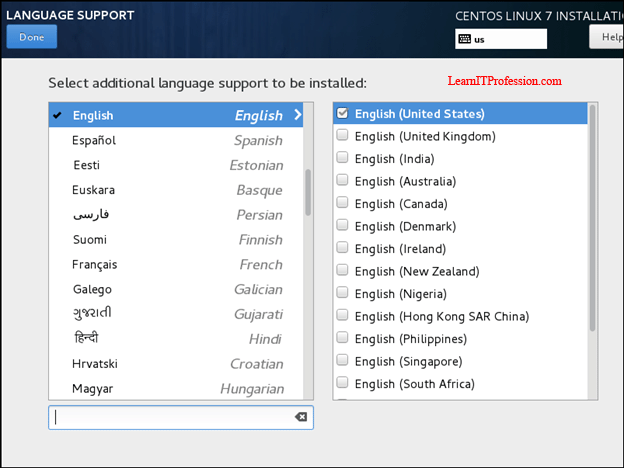
In Step 2 set the LANGUAGE SUPPORT, By default English language is select with default keyboard layout settings English (United States), you can set as per your need.
In Step 3 add multiple KEYBOARD layout and set your prefer keyboard layout at the top. By default English (US) is selected.
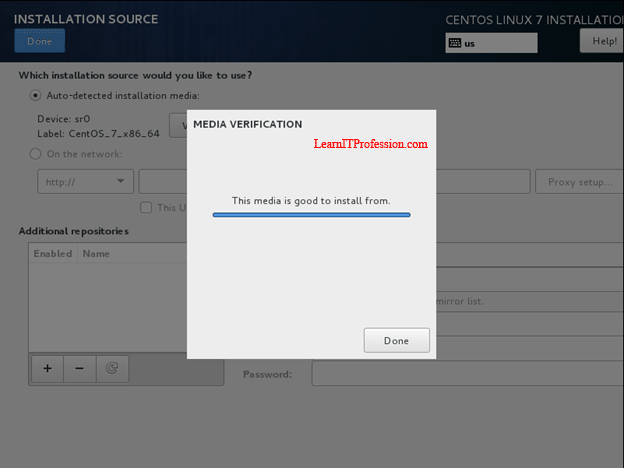
In Step 4 select INSTALLATION SOURCE means installation media, by default boot device is select as installation media. Here you can see Centos 7 installation media already selected.
To check the health of installation media of Centos 7 click on Verify button, if the message is shows This media is good to install from its mean Centos Linux 7 ISO image file health is perfect.
After verify the image file press Done button.
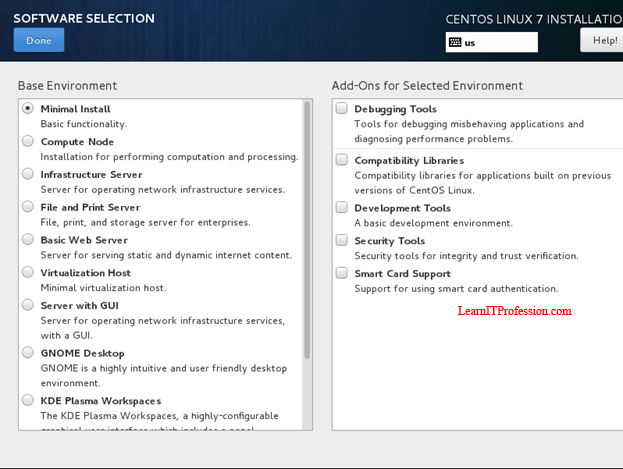
In Step 5 choose the SOFTWARE SELECTION, By Default Minimal Install is select with Basic Functionality, you can choose as per your requirement. In Minimal installation of Centos Linux 7 Graphical interface is not install only command line interface is install, for graphical interface you should select GNOME Desktop in Base Environment.
In Step 6 select the INSTALLATION DESTINATION, This is virtual machine environment here only 14GB hard drive is attach. you can attach more space hard drive as per your need. After select the hard drive press the Done Button.
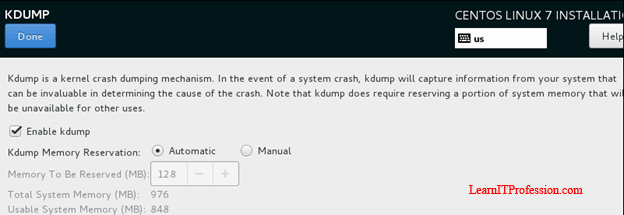
In Step 7 set the memory size of KDUMP, KDUMP is a kernal crash mechanism. By default it is enable, It's take the fix amount of memory from total memory. KDUMP memory reservation set on Automatic you can set it manual as per your environment need.
In Step 8 set the NETWORK & HOST NAME of Centos Linux 7 installation, By default IP configuration is set automatically if DHCP Server or DHCP Device is available in an environment.
For Manual Configuration of IP click on configure button and set the IP as per your need, if you have a domain environment you can also set the domain name in Search domains for just locate your Centos Linux 7 machine in domain.
Note: In Search domains you can add your Domain Name this is not the mean that your Centos Linux 7 machine is join the domain. The domain join process is different.
After manual configuration of IP, The IP configuration is shown below as per your need.
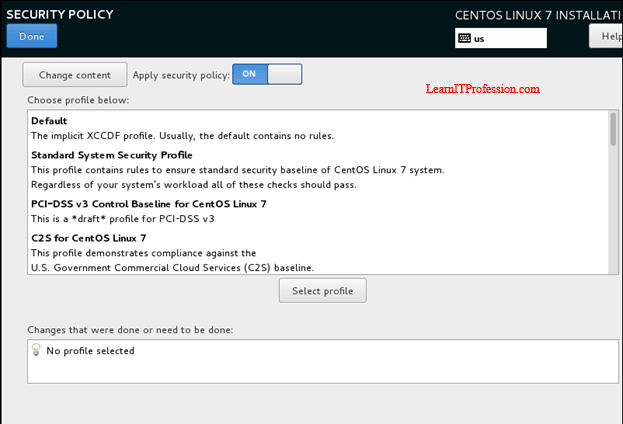
In Step 9 set SECURITY POLICY during the Centos Linux 7 installation Process, By Default no policy is select.
After set all Steps click on Begin Installation to start the installation process of Centos Linux 7 Installation.
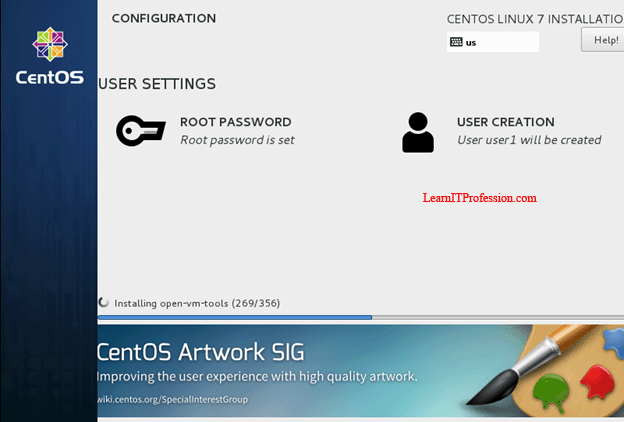
In installation process it require to set the root password and create another user with administrative or non-administrative rights as per your need.
Here root password set already and user is create already with the name of user1 for your convenience the image is shown below. Root user is by default top level account in Linux machine so set strong password and must remember it. Here simple password is set for root user for easy to remember.
Create another user as per your need with administrative or non-administrative rights. Here user is create with non-administrative rights with the name of user1. You can set new user with administrative rights by select the option of Make this user administrator.
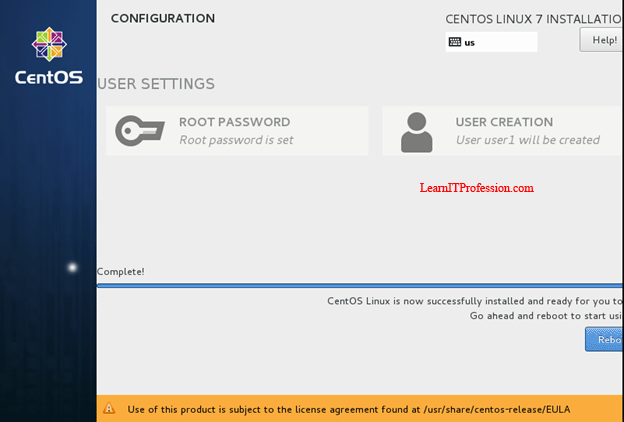
After complete the installation of Centos Linux 7 unplug bootable media and press reboot button.










Comments
Post a Comment