Installation of Debian 9 with LVM
Installation of Debian 9.8 with LVM
Debian is an open source Linux Operating System. The Founder of Debian Linux Operating System "Lan Murdock" August 16, 1993. The initial release of Debian Operating System is September 15,1993.
LVM stands for Logical Volume Manager. The concept of LVM is that with the help of single or multiple hard drives create a single Volume Group (VG) inside Logical Volume Manager (LVM) then create a multiple logical partitions like root "/", /boot, /home, /var, /swap, /srv, /tmp and etc inside a Volume Group.
The benefit of Logical Volume Manager (LVM) resize the logical partitions as per need and also customize the size of partition.
This is Installation of Debian 9.8 with minimal features means only core of the Debian Linux OS will install with Logical Volume Manager (LVM) concept.
This is a Virtual Machine environment. The ISO File is use to install Debian 9.8 is debian-9.8.0-amd64-netinst. Netinst means small size installation image file it contain only core of Debian installer files. This is core installation of Debian 9.8 with LVM, if you use this ISO image "debian-9.8.0-amd64-netinst" for Graphical installation internet is the main requirement.
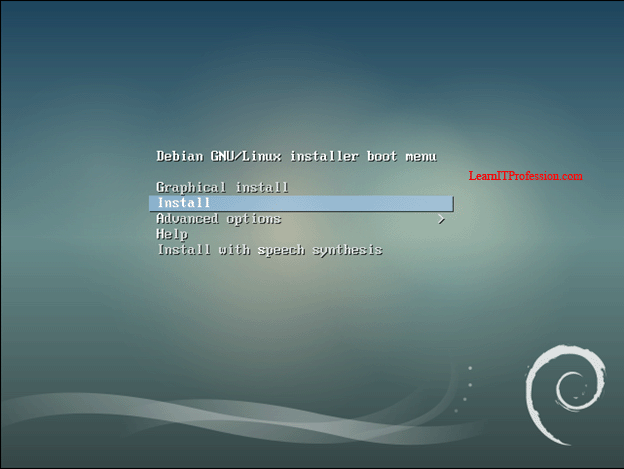
Installation of Debian 9.8 GNU/Linux click on install.
Select the language for the installation process Debian 9 with LVM. The default language is English, you can choose your own language but keep in mind this is the language for the installed system.
Select your location that will be use to set your time zone. Due to English language selection the default location is set United States, you should set your location area that will help to set your time zone.
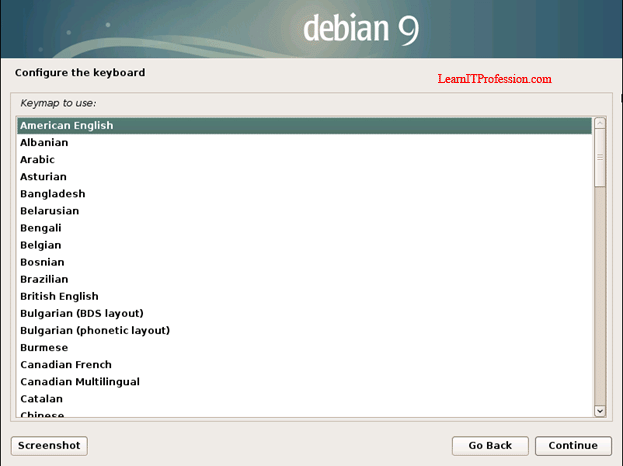
Set the layout of keyboard. By default American English is selected, you can select another keyboard layout as per your need.
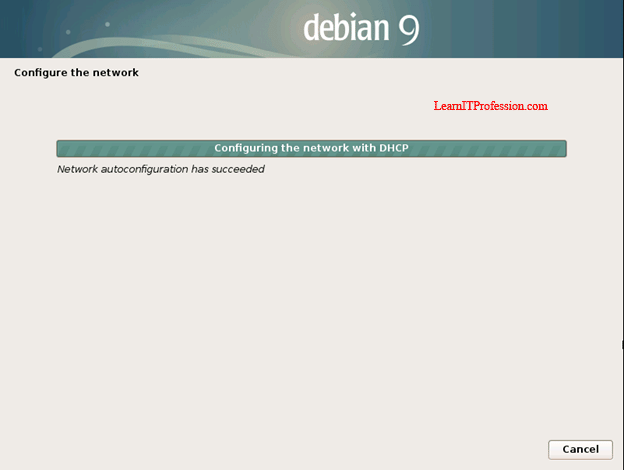
After set the keyboard layout press continue. It is configuring the network, if your environment contains a DHCP Server then it will take an automatic IP configuration.
DHCP Server is available in this environment therefore it take the automatic IP configuration.
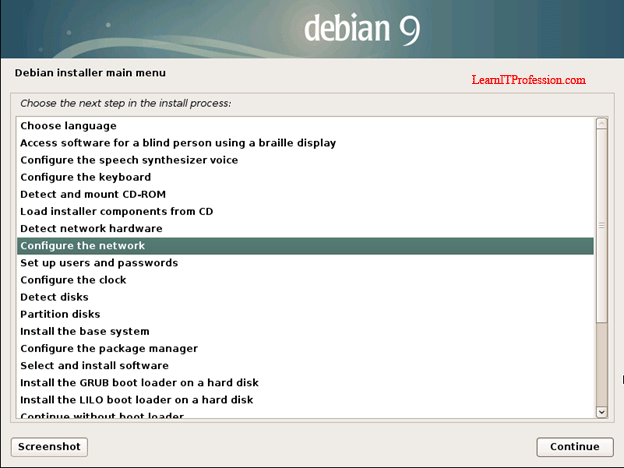
After automatic configuration of IP the hostname setting page is shown, if you want to configure manual IP instead of automatic then click Go Back.
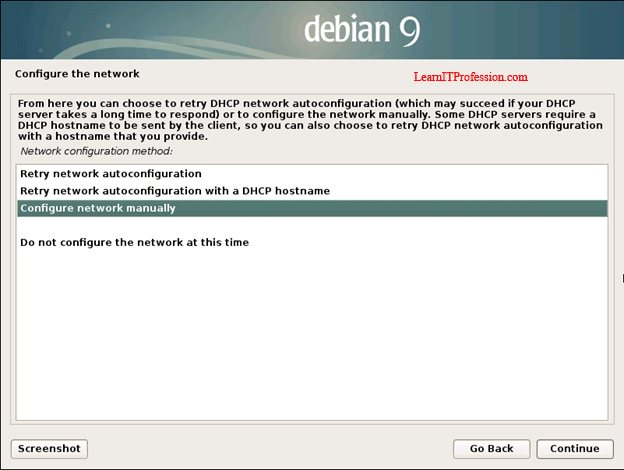
For manual IP configuration with network settings click on configure the network.
Press continue to configure the network then double click to configure network manually.
After double click on configure network manually enter your desire IP address in the IP address section.
After set the IP address set the subnet mask of network. The default subnet mask of Class B private network (172.16.0.0 to 172.31.255.255) is 255.255.0.0 but in this environment is set as 255.255.255.0.
Set the gateway of network. The purpose of gateway is sent the traffic outside the LAN.
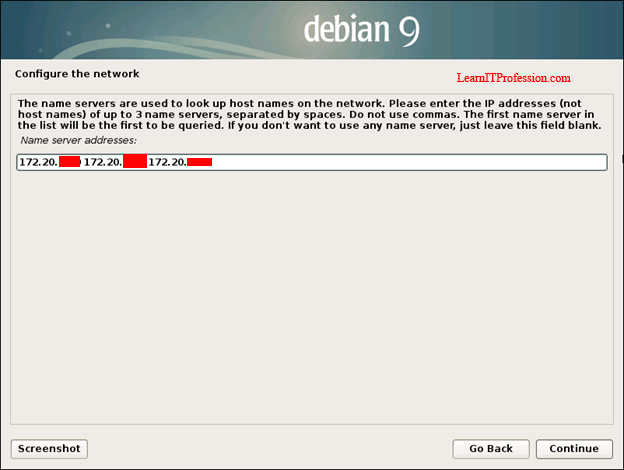
Enter the DNS addresses as per your environment, DNS addresses also known as name server addresses. DNS addresses use to point the hostname on the network.
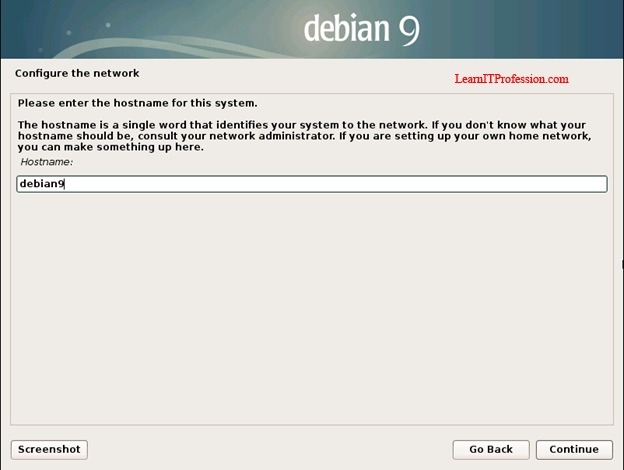
After set the the DNS addresses set the hostname as per your requirement. Here debian9 is set as a hostname.
Set the domain name of your environment. Here set the domain name its not mean that debian 9 machine has joined the domain it just point the hostname in network.
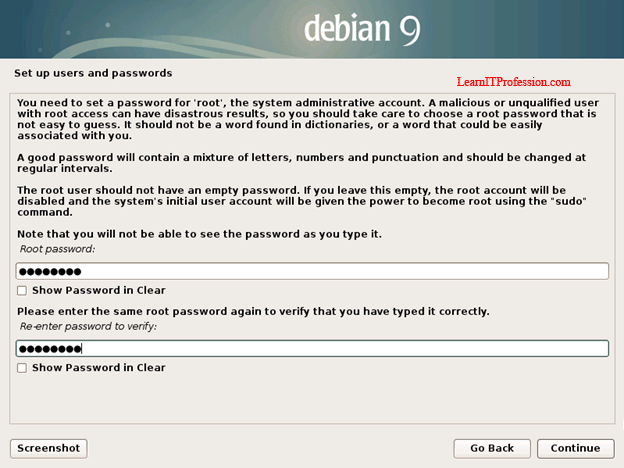
Set the strong root password. Root is the Super user of Linux Base operating system, In our case Debian Linux 9.8.
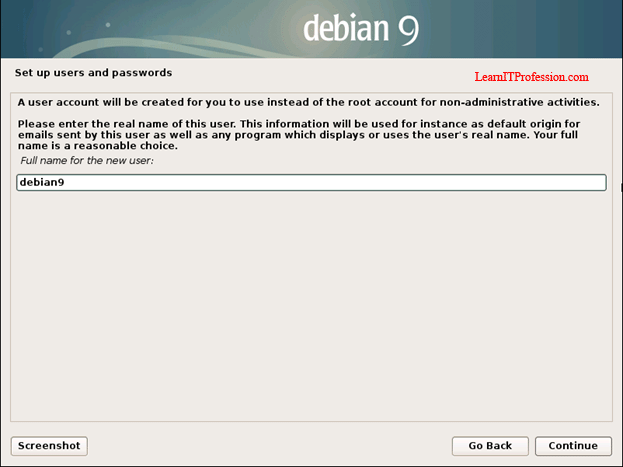
Create a user account that perform non administrative activities.By default in Debian 9.8 this user account also help to take remote (ssh session) then you switch to root user to perform administrative activities. Set the full name of this new user account, here debian9 is set as a full name you can set as per your choice.
Set the username of new user account in lower case letters with combination of numbers it your choice, here debian9 is set as username.
Set a good password of new user account by use of letters, numbers and punctuation for security purpose.
After press continue it configuring the clock and getting the time from the network time server that you have set in location.
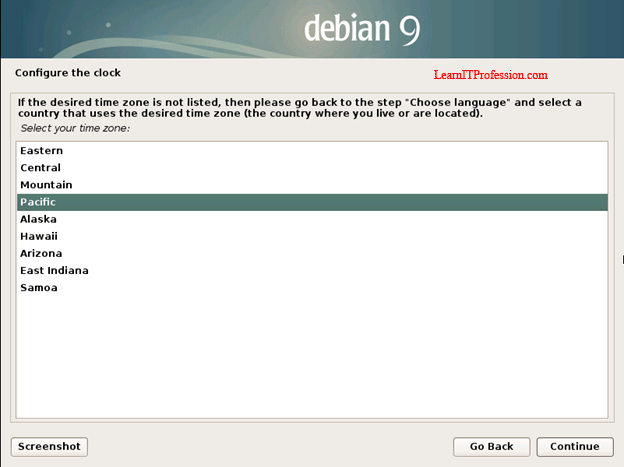
Select the desired time zone. Here Pacific is set as the desired time zone, you can set as per your location.
After set the time zone press continue and it's starting up the partition disks.
Configuring the customize size partitions with the concept of Logical Volume Manager (LVM) click on Manual.
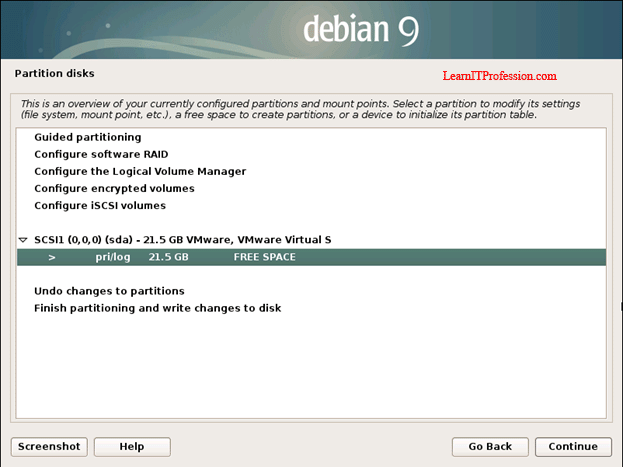
Select a partition disk to create a partition. Here hard disk size is 20GB that Debian Linux 9.8 installation process shows 21.5GB, you should take hard drive size as per your requirement.
After select a hard drive select yes radio button to create a new empty partition table on this device.
Create a partitions root "/", /boot, /home, /var, /srv, swap and /tmp. you can create partitions as per your requirement.
Note: root "/" and /boot partitions is the basic requirement of Linux base operating system, In our case Debian Linux 9.8.
Boot Partition:
Create /boot partition as a standard partition without LVM because if we create a boot partition inside a Volume Group (VG) of Logical Volume Manager (LVM), Linux base operating system will not boot in our case Debian Linux 9.8. Boot partition is require to boot "start" the operating system.
Requirement of Boot Partitions are as follows.
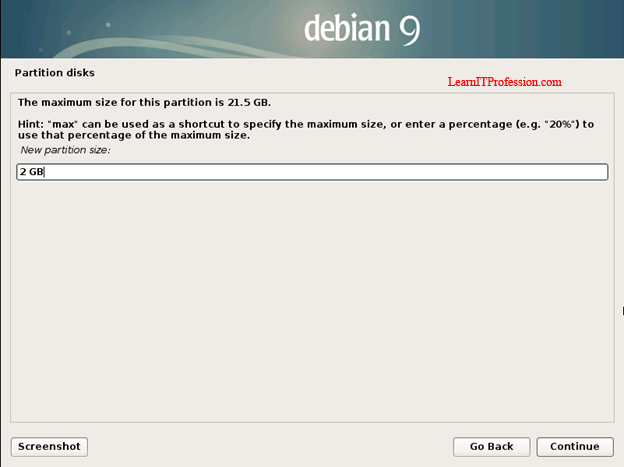
Partition Size: 2GB
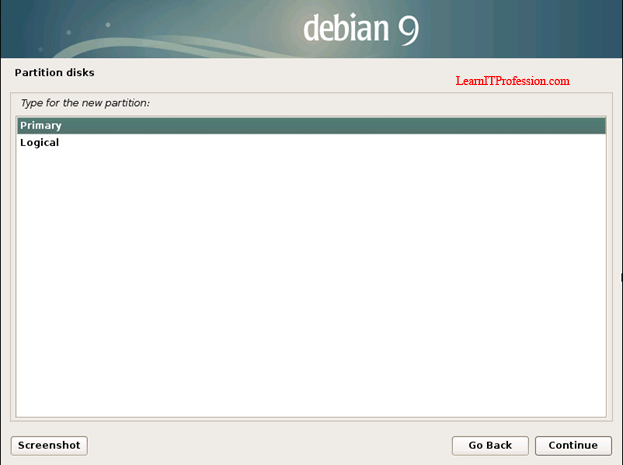
Type for the new partition: Primary
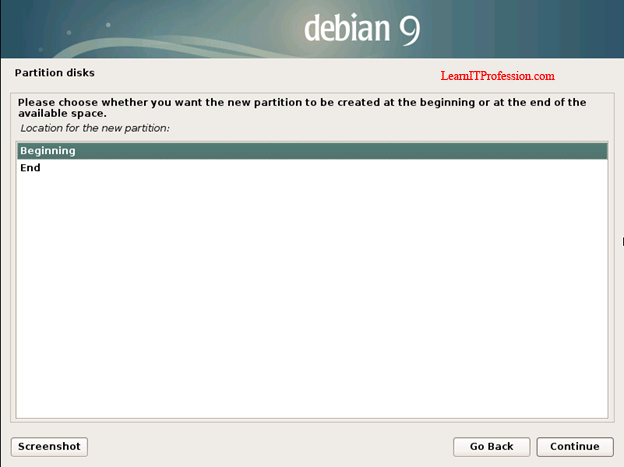
Location for the new partition: Beginning
Use as: Ext4 journaling file system
Mount Point: /boot
Lable: boot
Bootable Flag: on
Click continue to create a /boot partition then click on "Create a new partition".
Enter the size of boot partition. Here 2GB size is use for the boot partition, you can take 1GB size of boot partition that is also desirable.
Set the type of the boot partition is primary.
Select the location of boot partition mean create boot partition at the beginning or at the end of available space in hard drive. Here Beginning is select.
Set File System mean Use as "Ext4 journaling file system", Mount point "/boot", Label "boot", Bootable flag "on". After set all the requirements of boot partition click on "Done setting up the partition" then press continue.
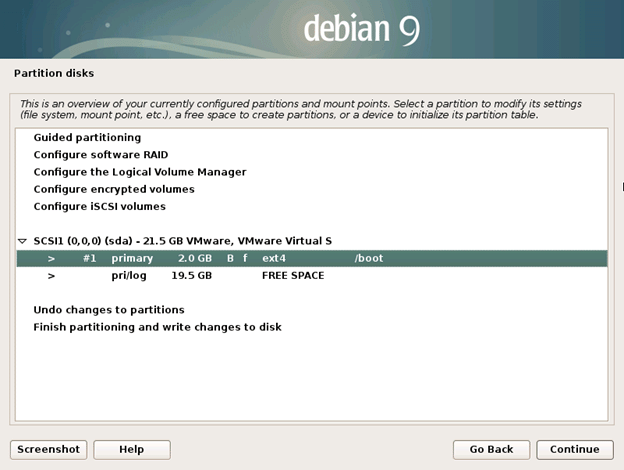
After press continue boot partition has created.
All other partitions like root "/", /home, /srv, /var, /swap, /tmp create inside Volume Group "VG" of Logical Volume Manager "LVM".
Create Volume Group "VG" inside Logical Volume Manager "LVM" click on "Configure the Logical Volume Manager".
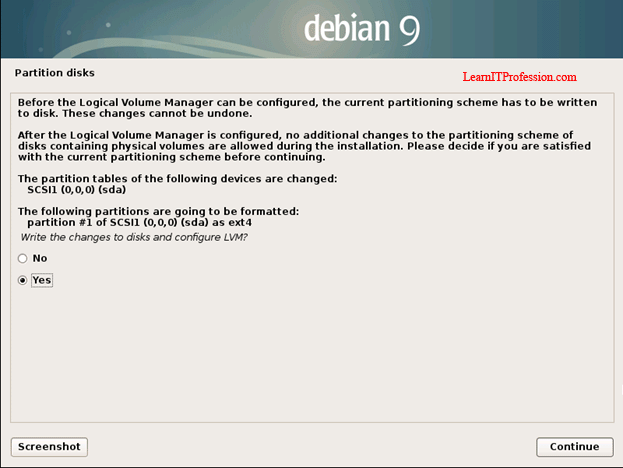
Configure Logical Volume Manager "LVM" click on yes radio button, the selected partition formatted as ext4.
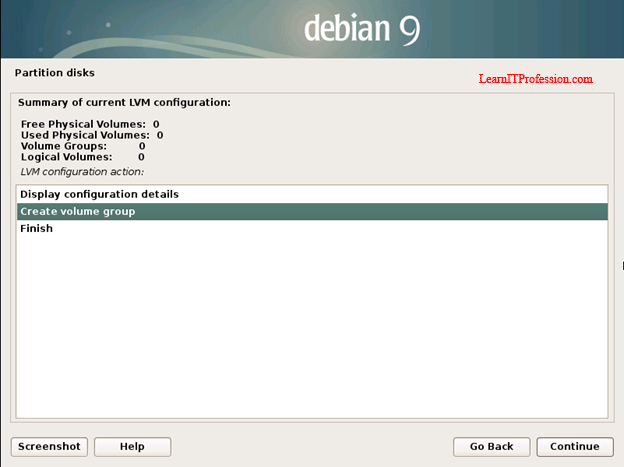
Create a Volume Group "VG" inside a Logical Volume Manager "LVM" click on "Create volume group" then press continue.
Enter the Volume group name. Here Volume group name is "NEWLVMGROUP", you can set any suitable volume group name as per your choice.
Select a device with free space that use to create new Volume Group "VG", here only single device is available "/dev/sda" with size of "19475MB" select it then press continue.
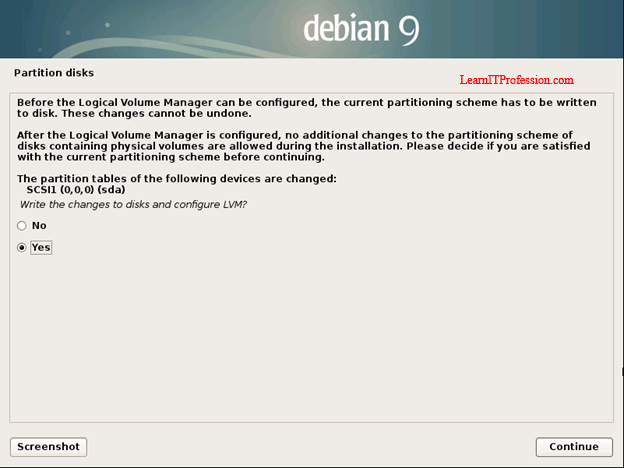
After press continue click on yes radio button to write the changes on disk and configure LVM.
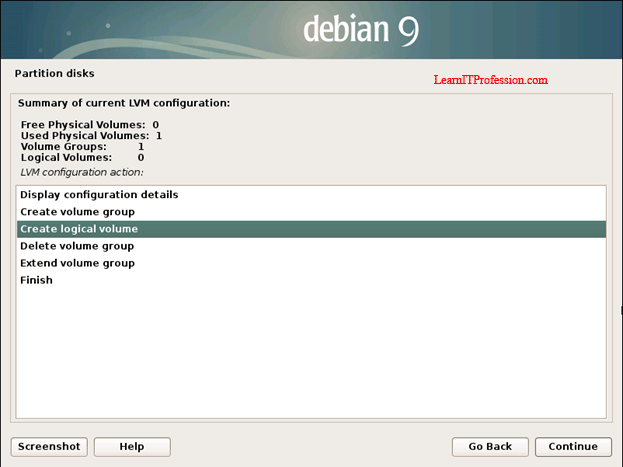
The Volume Group "VG" inside a Logical Volume Manager "LVM" has created, Now create a Logical Volumes root "/", /home, /var, /srv, /tmp, swap. Here we create only root "/" partition, other partitions create similar as root "/".
Root Partition:
Root "/" is a top partition of Linux operating system in our case Debian Linux 9.8. For Successfully boot the operating system of Linux, the File System must be mount on root "/" partition.
The requirement of root partition are as Follows.
Logical volume name: root
Logical volume size: 8GB (Set as per your requirement)
Create a Logical Volume root "/" click on Create logical volume.
Select a Volume Group "VG" for create a new logical volume root "/".
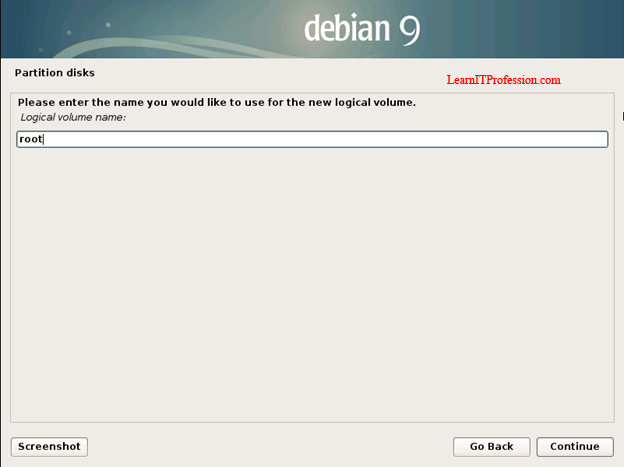
Enter the name of new logical volume that is root.
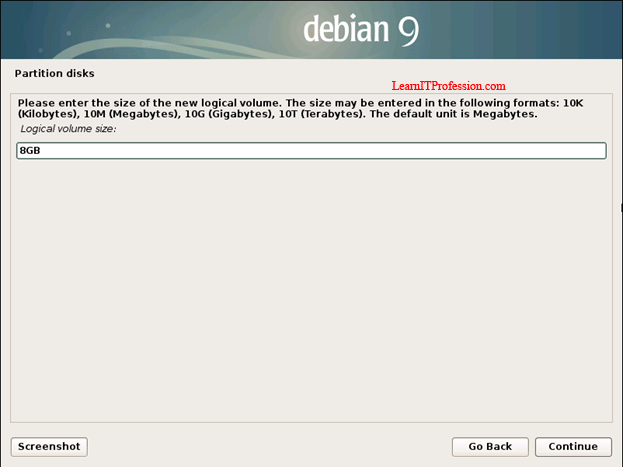
Enter the size of new logical volume root "/". Here we set the size of root "/" partition is 8GB, you can set the size of root "/" partition as per your own requirement.
After press continue the new logical volume root "/" partition has created.
Home Partition:
/home partition is use where users save his/her personal files, By default user have no rights to read and write the files and folders to other users home folder.
Create /home partition the requirement are as follows.
Logical volume name: home
Logical volume size: 5GB (You can set as per your requirement)
Use similar steps to create /home partition as root "/".
SRV Partition:
/srv partition use as data for services provided by the system. /srv partition is an optional partition in Linux operating system, Basic requirement of /srv partition is when you deploy a protocol like ftp, www and etc.
Create /srv partition the requirement are as follows.
Logical volume name: srv
Logical volume size: 2GB (you can take as per your requirement)
Use similar steps to create /srv partition as root "/".
VAR Partition:
/var partition is use as variable data. /var partition is optional partition of Linux operating system. Basically /var partition is use for cache files, log files, spool files of printer jobs, and temporary files, these files have their own directories like /cache, /log, /spool and /tmp respectively.
Create /var partition the requirement are as follows.
Logical volume name: var
Logical volume size: 1GB (you can take as per you requirement)
Use similar steps to create /var partition as root "/".
SWAP Partition:
Swap partition is use when your System RAM not support your desire operations. Swap partition is an optional partition.
Calculation of Swap partition are as follows.
If System RAM is Less then or Equal to 2GB then Swap partition should be the RAM Size multiply by 2.
Example:
System RAM: 1GB.
Swap Partition: 1GB (System RAM Size) * 2= 2GB (SWAP Partition Size)
If System RAM is Greater then 2GB then Swap partition is RAM Size add with 2GB. This is the minimum requirement of Swap partition size when system RAM is greater then 2GB.
Example:
System RAM: 3GB
Swap Partition: 3GB (System RAM Size) + 2GB= 5GB (Swap Partition Size)
Create Swap partition the requirement are as follows.
Logical volume name: swap
Logical volume size: 2GB (Due to System RAM 1GB)
Use similar steps to create swap partition as root "/".
TMP Partition:
/tmp partition is use for the temporary files of Linux operating system. The temporary files remove after the operating system reboot.
Create /tmp partition the requirement are as follows.
Logical volume name: tmp
Logical volume size: 1GB (you can take more size as per your requirement)
Use similar steps to create /tmp partition as root "/".
After create all the require partitions click on Finish.
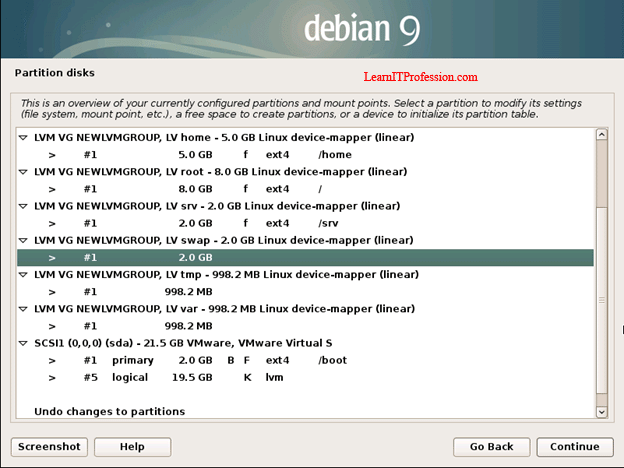
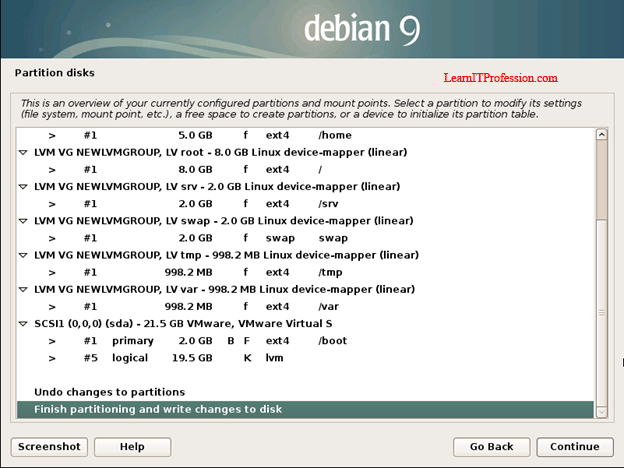
This is an overview of all the partitions that we have created, To modify the settings click on each partition and set mount point and file system.
Configure Home Partition:
To modify the settings of /home partition double click the size of /home partition.
Requirement to modify /home partition are as follows.
Use as: Ext4 journaling file system
Mount point: /home
Label: home
After set all the settings click on "Done setting up the partition" and press continue.
Root Partition:
To modify the settings of root "/" partition double click the size of root partition.
Requirement to modify root "/" partition are as follows.
Use as : Ext4 journaling file system
Mount Point: /
Label: root
After set all the settings click on "Done setting up the partition" and press continue.
SRV Partition:
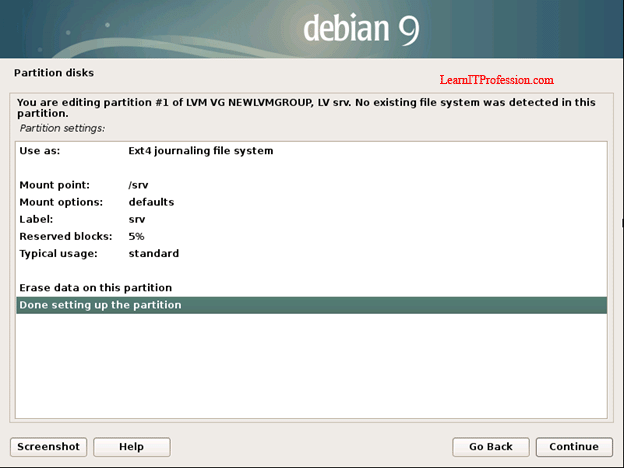
To modify the settings of /srv partition double click on the size of /srv partition.
Requirement to modify /srv partition are as follows.
Use as : Ext4 journaling file system
Mount Point: /srv
Label: srv
After set all the settings click on "Done setting up the partition" and press continue.
Swap Partition:
To modify the settings of swap partition double click the size of swap partition.
Requirement to modify swap partition are as follows.
Use as: swap area
After set Use as "swap area" click on "Done Setting up the partition" and press continue.
TMP Partition:
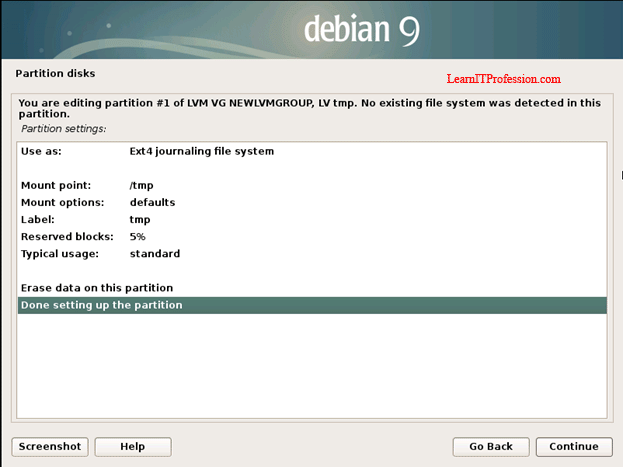
To modify the settings of /tmp partition double click the size of /tmp partition.
Requirement to modify /tmp partition are as follows.
Use as: Ext4 journaling file system
Mount point: /tmp
Label: tmp
After set all the settings click on "Done setting up the partition" and press continue.
VAR Partition:
To modify the settings of /var partition double click the size of partition.
Requirement to modify /var partition are as follows.
Use as: Ext4 journaling file system
Mount point: /var
Label: var
After set all settings of /var partition click on "Done setting up the partition" and press continue.
After modify all the settings of all partitions inside Volume Group "VG" of Logical Volume Manager "LVM" click on "Finish partitioning and write changes to disk".
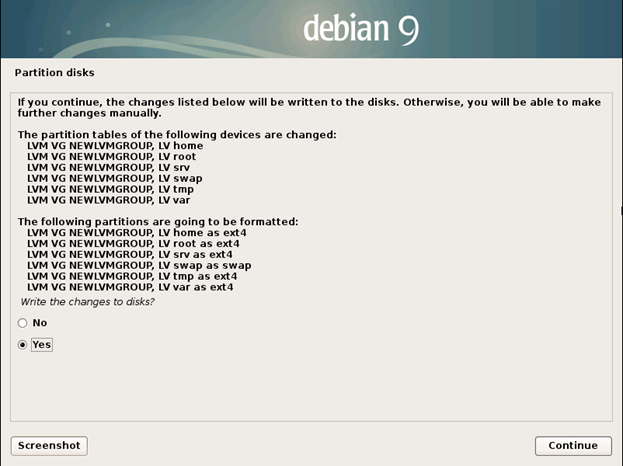
Click on yes radio button for write the changes to disk then press continue.
The all partitions are going to be formatted and the partition tables of LV home, LV root, LV srv, LV swap, LV tmp and LV var are changed.
After formatting the all partitions base system installation in progress.
If you have another CD or DVD for the installation of Debian 9.8 with LVM insert to scan it otherwise click on no radio button then press continue.
Configure the package manager choose the best mirror location that is close to your network. This is the Minimal installation of Debian 9.8 with LVM means core installation of Debian 9.8 with LVM, here we press go back
Select yes to continue without a network mirror for the Installation of Debian 9 with LVM.
After press continue its configure the package manager with core feature of Debian 9.8.
In this Installation of Debian 9.8 with LVM its install the software's that include in core installation.
Select yes or no its your own choice to participate in the package usage survey. Here we select no then press continue.
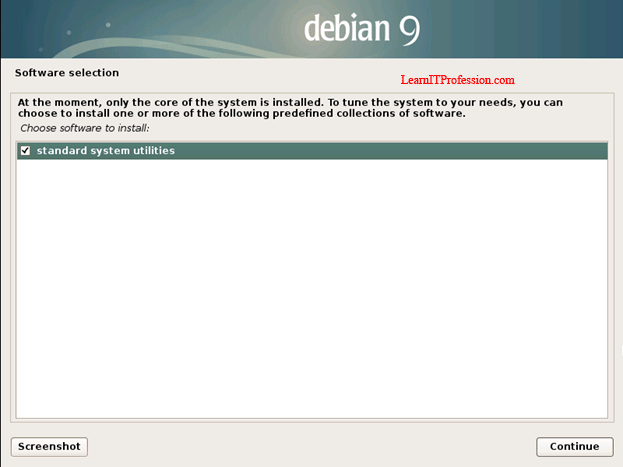
This is the core Installation of Debian 9.8 with LVM therefore only standard system utilities option is available in the list of choose software to install other wise more options will be available like SSH, Graphical User Interface and etc, if we select suitable mirror.
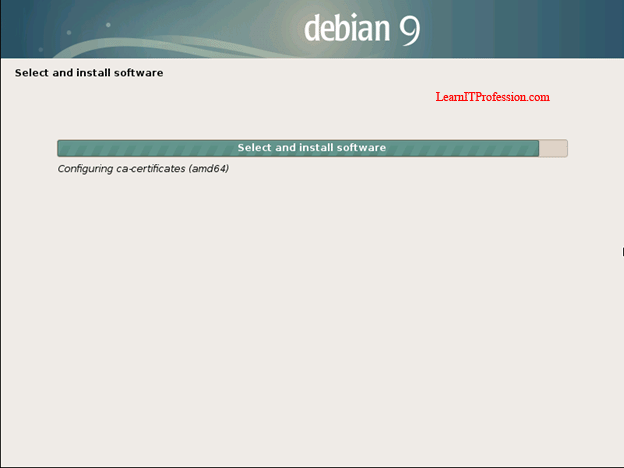
After press continue standard system utilities is installing.
To install the Grub boot loader to the master boot record click on yes radio button then press continue.
Grub boot loader is a package. If you install it you can select an operating system that you want to run means you have a multiple choices to select and run your own choice operating system, this option is more suitable when you are installing Linux operating system with Graphical User Interface feature. At this point you will have an option to run operating system in Graphical User Interface or Text User Interface (Command Line Interface).
To install a boot loader on hard disk select available hard drive, Best choice is to install a Grub boot loader on a master boot record of first hard drive. Here we have a single hard drive "/dev/sda" so we select it.
After install the Grub boot loader, Installation of Debian 9.8 with LVM is complete press continue.
After press continue the system is rebooting.
Login with root user and view the partitions of Debian 9.8 with LVM type below command.
df -hT
Thanks for read this Article.



























Comments
Post a Comment